Goal:
- Run both .NET apps (frontend and backend) on an Azure VM
- Each accessible over HTTPS (e.g.,
https://app.example.comandhttps://api.example.com) - Use free SSL certificates (e.g., via Let’s Encrypt)
Phase 1 : Setup Azure VM and Network Configuration
🖥️ Create an Azure VM:
- OS: Windows Server 2019 Datacenter
- Size: Standard B2s (2 vCPUs, 4 GiB Memory)
- Public IP: Assign a static public IP during creation
🌐 Configure Network Settings (NSG – Network Security Group)
Navigate to your VM’s Networking > Network Interface > NSG (or directly via the NSG resource) and ensure the following security rules are in place.
🔐 Inbound Security Rules
| Priority | Name | Port | Protocol | Source | Destination | Action |
|---|---|---|---|---|---|---|
| 100 | RDP-Access | 3389 | TCP | Your public IP | Any | Allow |
| 200 | HTTP | 80 | TCP | Any | Any | Allow |
| 300 | HTTPS | 443 | TCP | Any | Any | Allow |
💡 Note: Azure uses priority numbers (not index). Lower values have higher precedence. Also, “Your public IP” means using a specific IP range (e.g.,
203.0.113.10/32) to restrict RDP access securely.
🔄 Outbound Security Rules (if defaults are missing)
| Priority | Name | Port | Protocol | Source | Destination | Action |
|---|---|---|---|---|---|---|
| 100 | VirtualNetwork | Any | Any | VirtualNetwork | VirtualNetwork | Allow |
| 200 | Internet | Any | Any | Any | Internet | Allow |
| 300 | DenyAll | Any | Any | Any | Any | Deny |
Phase 3 : Free SSL Setup on Azure VM Using WACS (Win-ACME)
📥 Step 1: Download Win-ACME
- Visit https://www.win-acme.com
- Download the latest .zip version
- Extract it (e.g., to
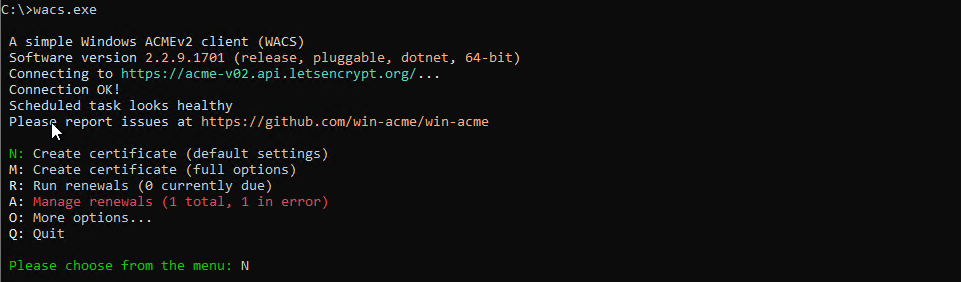
C:\win-acme) - Right-click
wacs.exe> Run as Administrator
⚙️ Step 2: Request a New SSL Certificate